

How To Wire A Light Switch: Easy Step-by-Step Guide for 2025
Homeowners often search for How To Wire A Light Switch when fixing a broken one or updating their space. This simple DIY task can save you money on an electrician. You need basic tools and safety steps to do it right. A standard single pole switch controls one light from one spot. It connects hot wires to brass terminals and grounds for safety. This guide walks you through the process with clear tips1. You will feel confident handling wires in your home. Always check local codes as rules may change by area.
Why Learn to Wire a Light Switch Yourself
Wiring a light switch builds skills for home care. Many people do it to replace old switches with new styles like rockers or dimmers. It takes about thirty minutes once you know the steps. Pros charge fifty to one hundred dollars for this job. Doing it yourself cuts costs and gives pride. Beginners start with single pole types before trying three way setups. Practice on a test board if new to electronics. This task fits renters too if landlords allow. It helps in old houses with worn wires. For more on home tools see this essential medical equipment guide though it focuses on health gear.
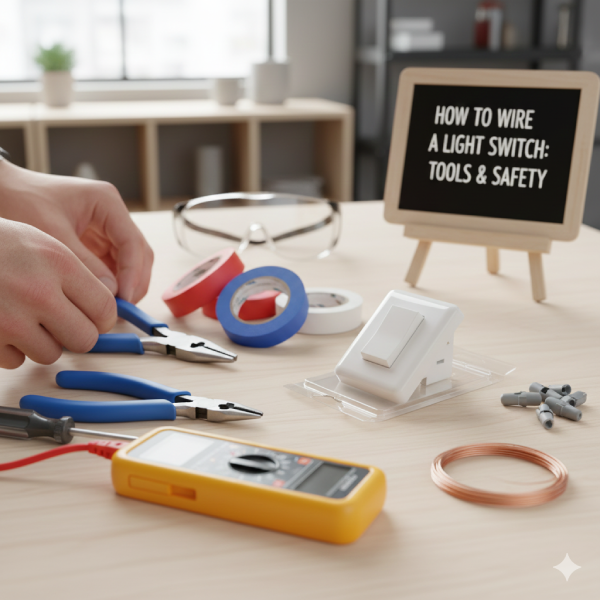
Tools and Materials You Need
Gather your items before you start. You need a flathead and Phillips screwdriver for screws2. Wire strippers cut and remove insulation from wires. A voltage tester checks if power is off. Needle nose pliers bend wires into hooks. Get electrical tape to wrap connections. A new light switch matches your old one in type. Wire nuts join wires if needed. Have a flashlight for dark boxes. Safety glasses protect your eyes. Gloves keep hands clean. These basics cost under twenty dollars at stores. Keep them in a toolbox for future jobs.
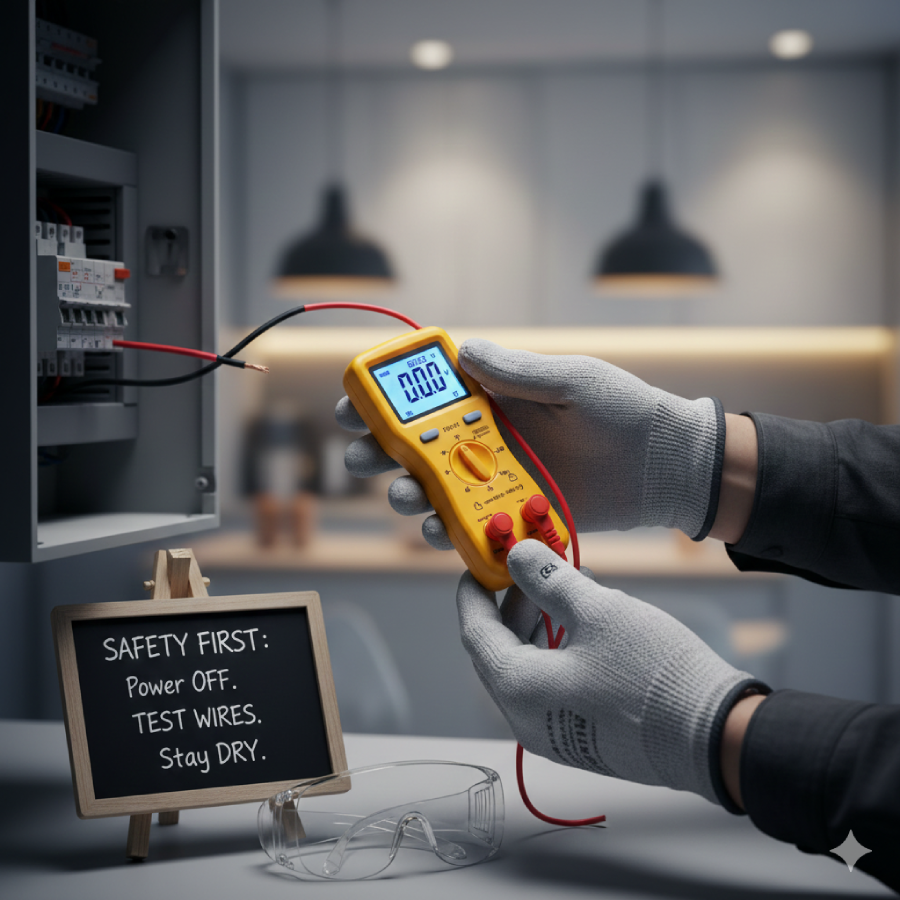
Safety First Before You Wire
Safety stops shocks and fires. Turn off power at your breaker box first. Find the right breaker by testing lights. Use your voltage tester on wires to confirm no juice. Work in good light and dry spots. Avoid touching bare wires with your hands. Ground yourself if static builds. Call a pro if wires look old or frayed. Follow codes for your area like NEC in the US. Kids and pets stay away during work. Double check power off each time. This keeps you safe for the job.
Understand Your Light Switch Types
Know your switch before wiring. A single pole handles one light from one place. It has two brass screws and one green ground. Three way controls from two spots like hallways. It adds a traveler screw. Dimmer switches cut light levels with extra wires. Smart switches need neutral wires for power. Check your box for wire count. Most homes use fourteen gauge wire for lights. Black is hot white is neutral, bare is ground. Mark wires with tape if confused. This helps pick the right switch3.
Prepare the Electrical Box
Open the box to see inside. Unscrew the face plate with your driver. Pull the old switch out gently. Note how wires connect. Take a photo for reference. Loosen screws to free wires. Straighten bent ends with pliers. Strip half inch insulation if ends are bad. Clean box of dust. Check for enough space. If wires are short add pigtails. This sets you up for new wiring.
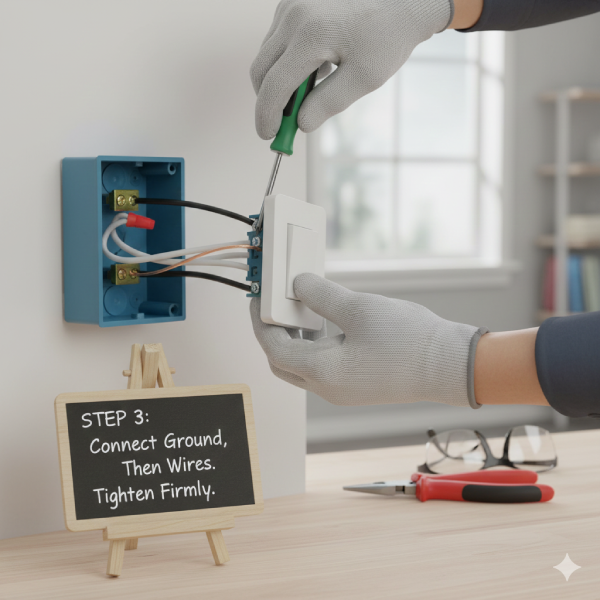
How To Wire A Light Switch with Basic Setup
Start with power off. Hook the hot black wire to one brass screw. Tighten it firm but not too hard. Attach the other black wire to the second brass. This is the load to your light. Connect bare ground to green screw. Push wires back neat. Screw switch to box. Put on a face plate. Turn the power on and test. Light should flip on and off smoothly. If not check connections. This basic way works for most homes.
Handle Common Wiring Configurations
Some boxes have extra wires. If power comes to switch first hot goes to bottom brass. Load to top. Neutral whites join with nuts. Ground to green. If power at a light switch leg uses white as hot. Tape it black to mark. Travelers in three ways are red or marked. Follow colors to match. Old homes may lack ground. Add one if code needs. These setups cover most cases.
Troubleshoot Wiring Problems
Lights flicker means loose wires. Tighten screws. No power check breaker. Switch buzzes replace it. Wrong flip means wires swapped. Use a tester to find hot. Ground fault trips breaker. Fix bare touches. Dimmer hums from bad matches. Use LED type. These fixes solve most issues fast.
Upgrade to a Dimmer Switch
Dimmer adds mood control. Wire like a single pole but check rating. Connect hot to black lead. Load to red lead. Ground to green. Neutral if smart type. Test levels are slow. This upgrade costs ten dollars more.
Wire a Three Way Switch Setup
Three ways need two switches. Power hot to the first common screw. Travelers to brass. Second, switch travelers to brass common to load. Grounds connect all. Mark travelers. This lets control from ends.
Tips for Old House Wiring
Old wires may have cloth cover. Handle gently. No ground, add pigtail to box. Aluminum wires need special nuts. Call pro if unsure. Update to code for safety.
When to Call a Professional
Complex jobs like four way need help. Odd colors are confusing. Permits required in some places. Shocks happen, stop and call. Pros ensure code compliance.
FAQs About How To Wire A Light Switch
What tools do I need for How To Wire A Light Switch?
You need screwdrivers flat and Phillips for screws. Wire strippers remove insulation clean. Voltage tester checks power off safely. Pliers bend hooks on ends. Tape marks wires clear.
How do I turn off power before wiring?
Find a breaker box at home. Flip switches till light goes out. Test outlet or light with tester. Lock box if others home. Double check wires no buzz.
What if my box has three wires?
Three wires mean black hot white neutral bare ground. Hot to brass neutral bypass ground to green. Tape if white hot in the old setup.
Can I wire a dimmer the same way?
Yes but use a dimmer rated for light type. Hot to black load to red ground green. Test dim levels, no flicker. Match watts to bulbs.
Why does my switch not work after wiring?
Loose screws cause no light. Swap hot and load. Breaker tripped reset it. Bad switches replace new ones. The tester finds the issue quick.
Conclusion
You now know How To Wire A Light Switch from start to test. Follow safety and steps for success. This DIY saves time and cash. Practice makes you a pro at home electrics.What switch project will you try first? Share below!
References
- Simple guide with tips: Future House Store How To Wire A Light Switch For homeowners 25-60 doing DIY repairs beginners to handymen focused on safe budget fixes with step-by-step help. ↩︎
- Step-by-step installation: Home Depot How To Wire A Light Switch ↩︎
- Wiring diagrams and basics: HomeTips Standard Light Switch Wiring ↩︎